Step 3 - Installation
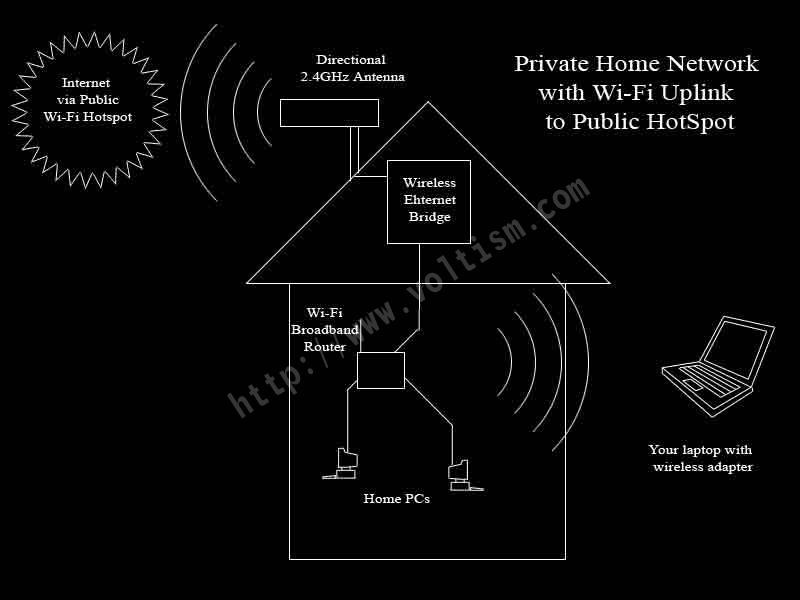
First of all, we need to make a quick plan. Get out some paper and start
drawing. Even very simple sketches can help a lot when you are executing a
big project like this, and it's always a good idea to visualize the process
before you actually start doing stuff. Where will you install the
antenna? What about the bridge? And do you know how the ethernet
cable will be run from the bridge to your new access point? You'll
probably want the access point in your living area, possibly near a desktop
computer so you can plug into your new network to get online.
Once you have a rough plan and have (hopefully) walked through it a couple of
times in your mind, we should be ready to begin. Mount the antenna to your
roof/house/whatever, and be sure there is enough coaxial antenna cable to make
it from the antenna to the bridge. If your bridge will be installed in,
say, your attic, you may need to drill a hole in the side of your home (from the
attic) to run the coax through, or you could potentially run the cable through a
vent or existing opening from the attic.
Mount the antenna.
Mount the bridge.
Connect the antenna to the bridge.
Run the ethernet cable from the bridge to your access point location.
If you're going the Power over Ethernet route, connect the POE adapters to power
the bridge as described in the POE adapter instructions.

<<< Previous Page | Next Page >>>